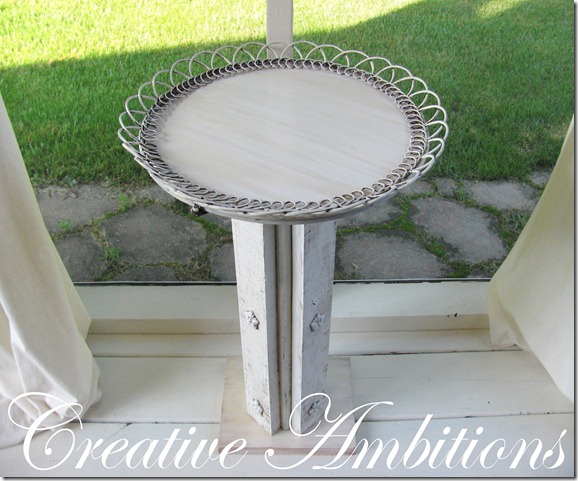
Wednesday, June 16, 2010

I’m Flattered… and Impressed

I know many of you have seen my crate table.

If you haven’t… Click Here to read about it.

final

Well, Kristi at Pumpkin Seed Productions really wanted my crate table for herself… really bad!

In fact, she asked me to will it to her!

I told her…”Well, that sounds good but I don’t plan on dying anytime soon!” 

Ha… well, I guess she couldn’t wait on me to “kick the bucket.”

So… she MADE one for herself!!

Here it is…

Crate table

crate

Isn’t it great??!!

CLICK HERE TO SEE HER POST.

So, then I told her… “You can will this to ME so I will have two!”

But then we called a truce because it sounded like we were planning each other’s demise!!

SOOOooo we decided to play checkers together on our tables instead!

(We had some fun teasing each other about this!)

So it’s all good!

But…

I gotta say Kristi…

  You did a fantastic job…  it looks fabulous! 

I’m flattered…  and impressed!

Thanks for Stoppin’ By!


Monday, June 14, 2010

OK… One More Time


Donna over at Funky Junk Interiors has a “Gitter Done” link party this week.  Isn’t that a great idea? I think it’s what we all needed! Thanks Donna!

I had lots planned but things went awry and the pressure washer as well as the chain saw had to go to the shop a couple of weeks ago…

They are still there!

So I knew I could paint something and this faux stacked stone wall has been on my list.

x

Click Here to see my recent post about the 2nd transformation on this wall.

y

But the color was still bothering me… it lightened up the space but not enough.

So… for the sake of “Gitter Done” Day… I went further and transformed it again.

Simple changes with simple decorating.

First, I lightened the wall (again) by painting a lighter stone and grout.  It finally turned out the way I wanted!!

Next, it was time to decorate the wall.

final9

I had some woven placemats from Walmart I picked up months ago for like $3.00 a piece.

My neighbor gave me extra coffee cans used for storing… well, not anymore!

final10 

I had rafia (LOVE rafia) and tied it around the cans.

final11

I used velcro at first to attach them to the place mat but it wasn’t as tight as I needed.

So, I hot glued the velcro together.  Now it’s on good!!

Took some flowers and plopped them in the cans.

Yes… it was that simple and cheap!

But once I had them up and in place… the placemats popped way too much (in my opinion)!  Just way too dark.

final3

final8

So… I took them all down and painted them a lighter color to blend in better with the wall.

However, I broke a decorating rule… I was taught to decorate in odd numbers… like three.  But… I made another and put four up!!

I like it better with 4!

final2 

final4 

final7

final5


 final11

Yay!! I’m finally happy with it… 3 paint jobs later!!

Gitter Done!!

Thanks for Stoppin’ By!


Linking to…

  FJI's Gitter Done! challenge

Broke Clock = New White Table For White Room!

Well, creativity hit me late Friday night. It was about 7:45ish and I saw this broke clock for the umpteenth time sitting in a closet … doing nothing… just sitting there… the nerve!

But this time was different. When I saw it THIS time, I knew it’s purpose!

004

So, I began to destruct it (that sounds like the opposite of construct, right?)

Well… I just googled it…

destruct: to destroy one’s missile or rocket after launch

008

007

Ok… so I took it apart.

Then, I found this sheet of wood I purchased from Lowes awhile back… I can say… it’s no longer sitting around doing nothing either!

I traced the clock face on the wood and got the handy jigsaw to cut my circle out.

009

Next, the painting began. I used some outdoor acrylic paint and the porch paint I bought for my white porch.

Now, the base… what to sit my new table top on?

010

012

So… I got out my scrap wood and began to construct… Ok… actually play… I had to come up with a pattern first.

When I figured out my pattern, I turned to my craft room for embellishments and found exactly what I needed.

Time: around 11:00 p.m.

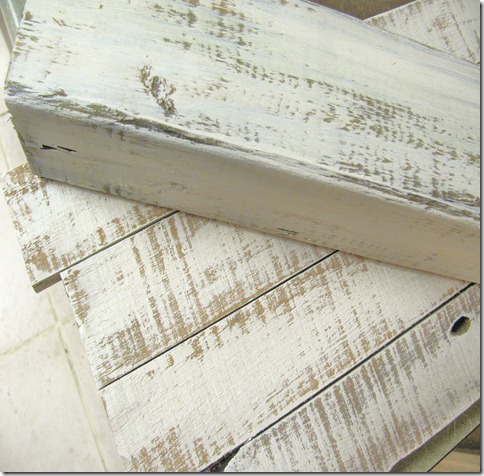
Hi Ho Hi Ho… back to painting I go…
016

014

015

After I got most everything painted with at least one coat, it was 12:00 a.m. and I was tired!

Hi Ho Hi Ho… it’s off to bed I go…

(I don’t know why I’m singing that during my post???)

Saturday morning = Base Construction!

I got my handy drill and went to drillin’! Woohoo!

I love all my tools!

I had my base that I needed to drill up into the post but not be wobbly because of the screw head. So I used the attachment that gave me a recessed hole where the heads would be hidden up in the base…

see…

021 020

But I was quite shy with this attachment at first and didn’t drill deep enough. So, I kept working with it until I got the right depth.

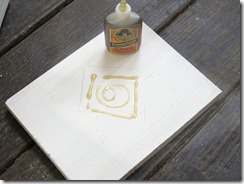
Then the trusty ole gorilla glue came out and I glued the base on the post.
023 022

After some drying time took place, I drilled three screws up into the post from the bottom of the base.

024 026

Next, I attached some scrap pieces of wood to each side of the post to give it a more bulky unique look. Then, I hot glued my little floral embellishments on.

002 003

And finally glued the tabletop down!

b

c

d

e

With a glass of sweet tea and a little encouragement from Joyce Meyer (I need all I can get)…

my new table will fit right in with my new white porch…

whenever I get that finished! :)


Thanks for Stoppin’ By!


Linking to

White wednesday 2


Furniture Feature Fridays


Funky Junk's Saturday Nite Special